网红雪碧渍黄瓜
- 拌

- 酸甜味

- <30分钟

- 新手尝试

最近雪碧黄瓜到处能看到呀,我心里也痒痒地,今天就来拔个草。但是网上的摆盘几乎是千篇一律,虽然好看,但我想要点不一样的,摆个花朵造型吧!
展开
网红雪碧渍黄瓜的食材2人份
- 黄瓜2根
- 小米椒3个
- 雪碧适量
- 味达美清香米醋1大勺
- 白砂糖1小勺
- 盐1/2小勺
展开
网红雪碧渍黄瓜的做法
1

准备好食材与调味料
2

小米椒去蒂切小粒
3

黄瓜先纵向剖开,可以一半小些一半大些,用刨皮刀在大的一半黄瓜切面刨出厚约1毫米的长条黄瓜片
4

小的一半切厚约1毫米的半圆形薄片
5

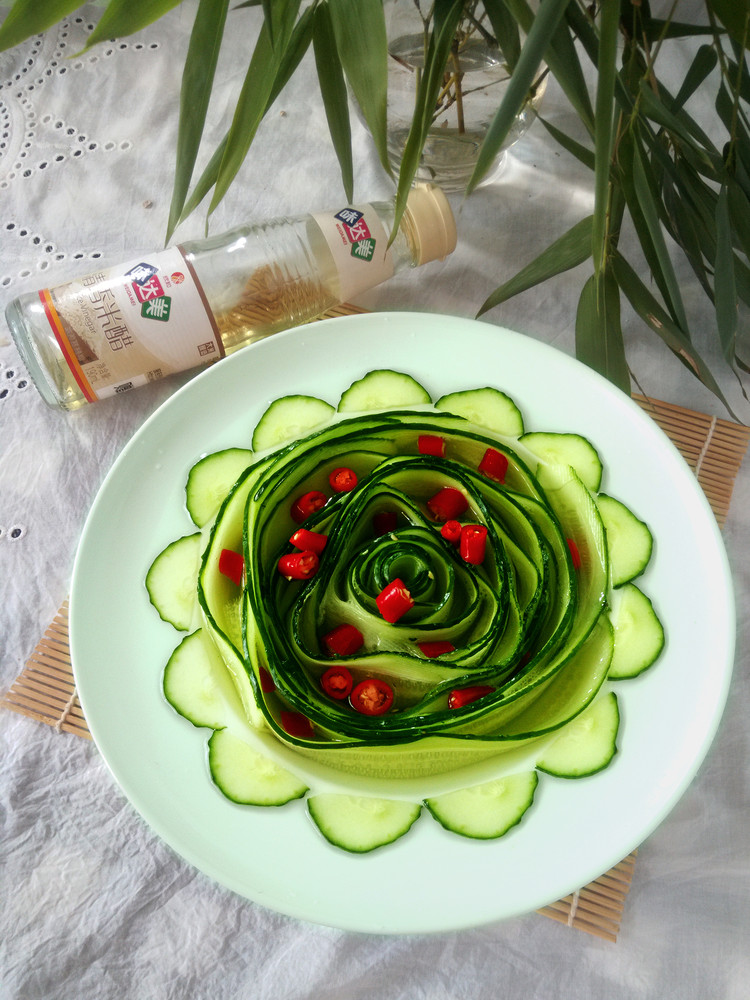
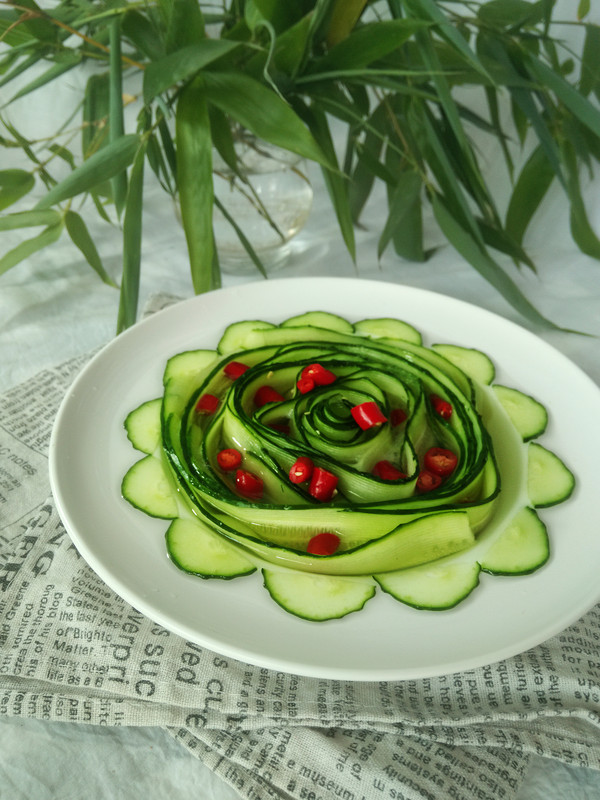
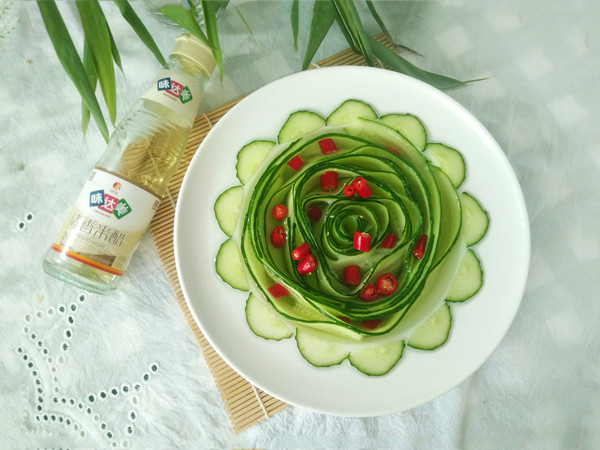
取一条长条黄瓜片从一头卷起,作为花芯竖立在盘子中央
6

再把一片片长条黄瓜片错开围在花芯外围,作为花瓣
7

均匀地撒上盐,再点缀红色的小米椒粒
8

淋上味达美清香米醋
9

倒入雪碧至盘子深度的八分满,不要倒满,黄瓜腌渍后会出水
10

最外圈的盘子边沿排上半圆形黄瓜片,花朵的形象就更漂亮了,冷藏冰镇半小时,更冰爽,酸酸甜甜,太开胃了!
成品图


网红雪碧渍黄瓜的烹饪技巧
①看到网友说雪碧是甜的,不用加糖,我就没加,但对于做任何菜都要加点糖的上海人来说,甜味不足,还是加一点糖更好吃
②其实就是酸甜口的腌黄瓜,但加了气泡水更爽口,冰镇一下会美味
版权声明:
除非特别标注,否则均为本站原创文章,转载时请以链接形式注明文章出处。
网红雪碧渍黄瓜标签:网红雪碧渍黄瓜的做法 网红雪碧渍黄瓜的家常做法 网红雪碧渍黄
上一篇上一篇:白萝卜炒鸡蛋
下一篇下一篇:外皮酥脆,吃起来软糯的炸山药,简单又好做


快乐的猫
评论列表
真的是厉害啊,爱了爱了
2021年06月15日 13:07